Crosshatching Sampler
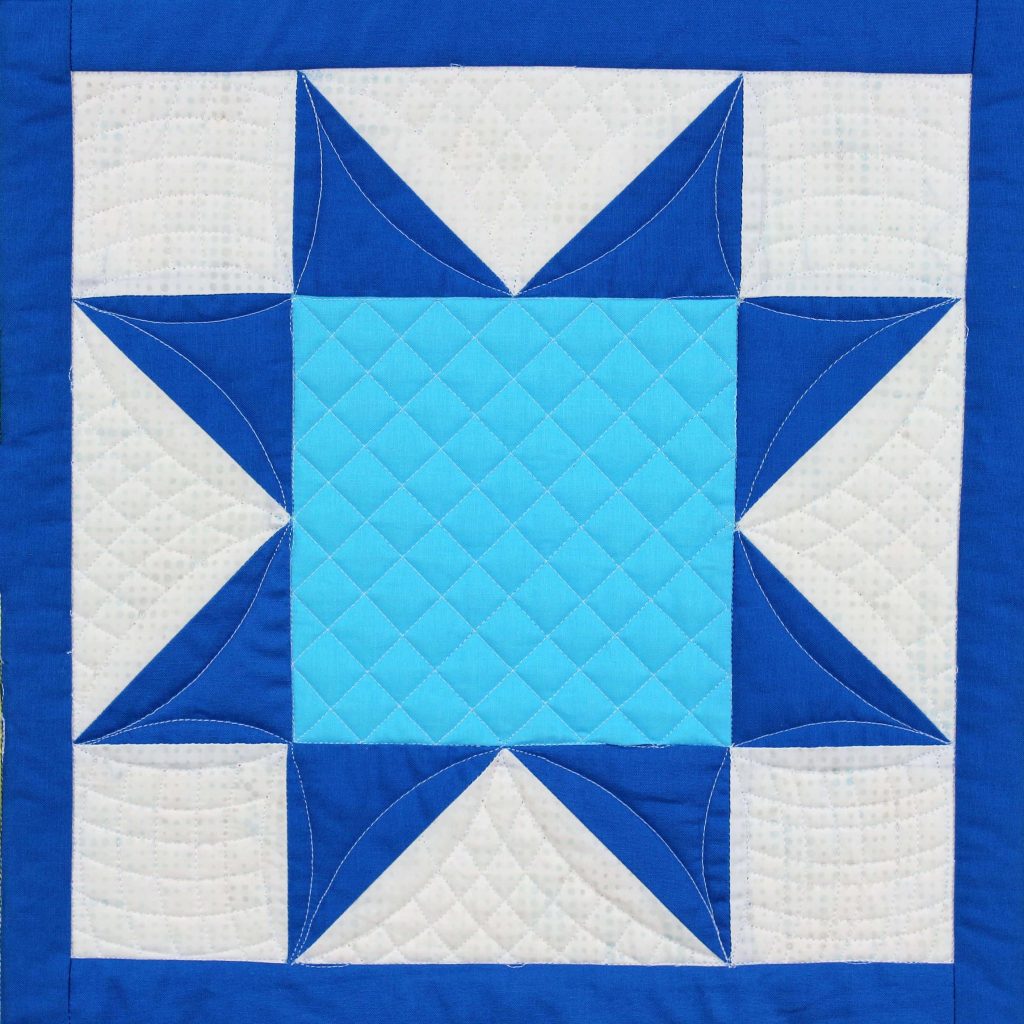
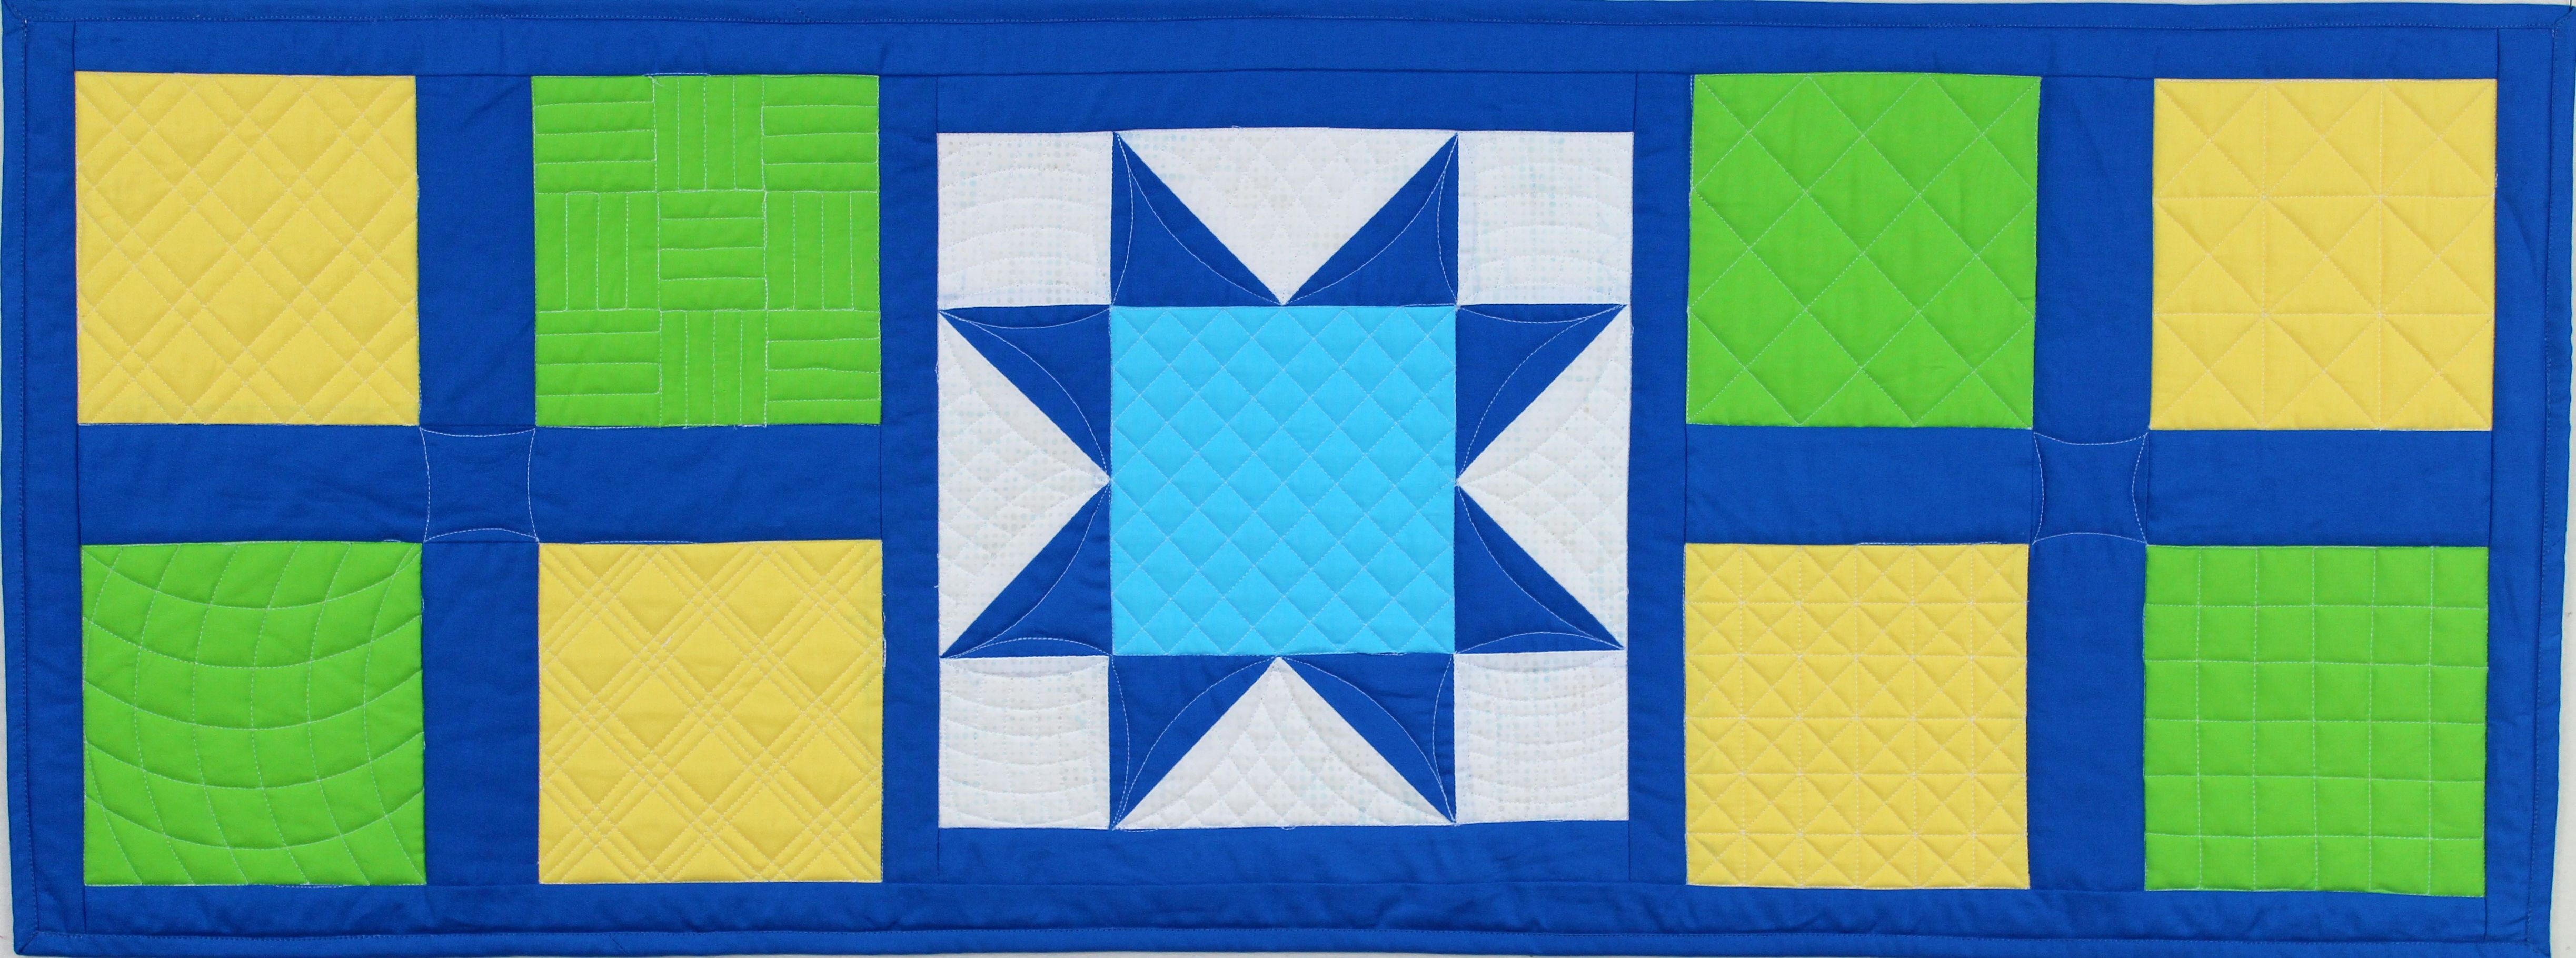
Crosshatching is at home in all genres of quilting from traditional to modern and it is a great motif to select when you want the piecing for the appliqué to be the true star. Crosshatching is based on a grid and can be stitched out in all sizes depending upon the density desired.
When working with a grid-based design, like crosshatching, it is a good idea to mark your grid using your favorite fabric marking device. That way, you can immediately tell if the grid needs to be tweaked a bit to fit in your space evenly.
Quilting with Rulers
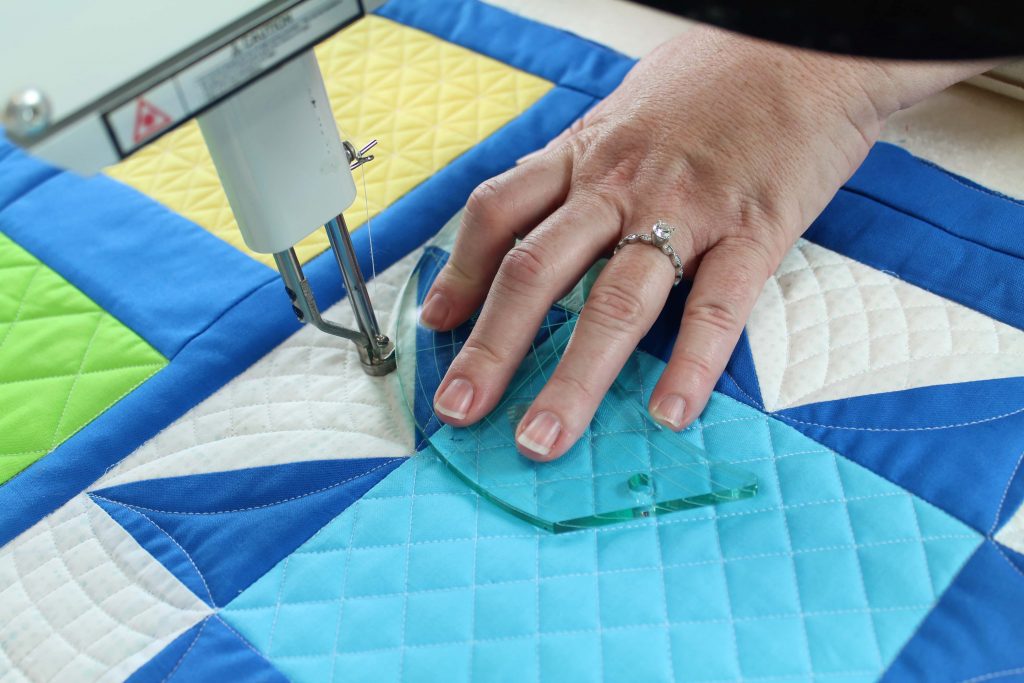
Remember that when stitching with a longarm machine, you’ll need your ruler foot for your machine, a machine quilting ruler, and a ruler base. If using a sit down domestic sewing machine, you can stitch some of these with just your walking foot attachment, but the others will require a free motion ruler foot and a long straight edge machine quilting ruler.
Double Crosshatch
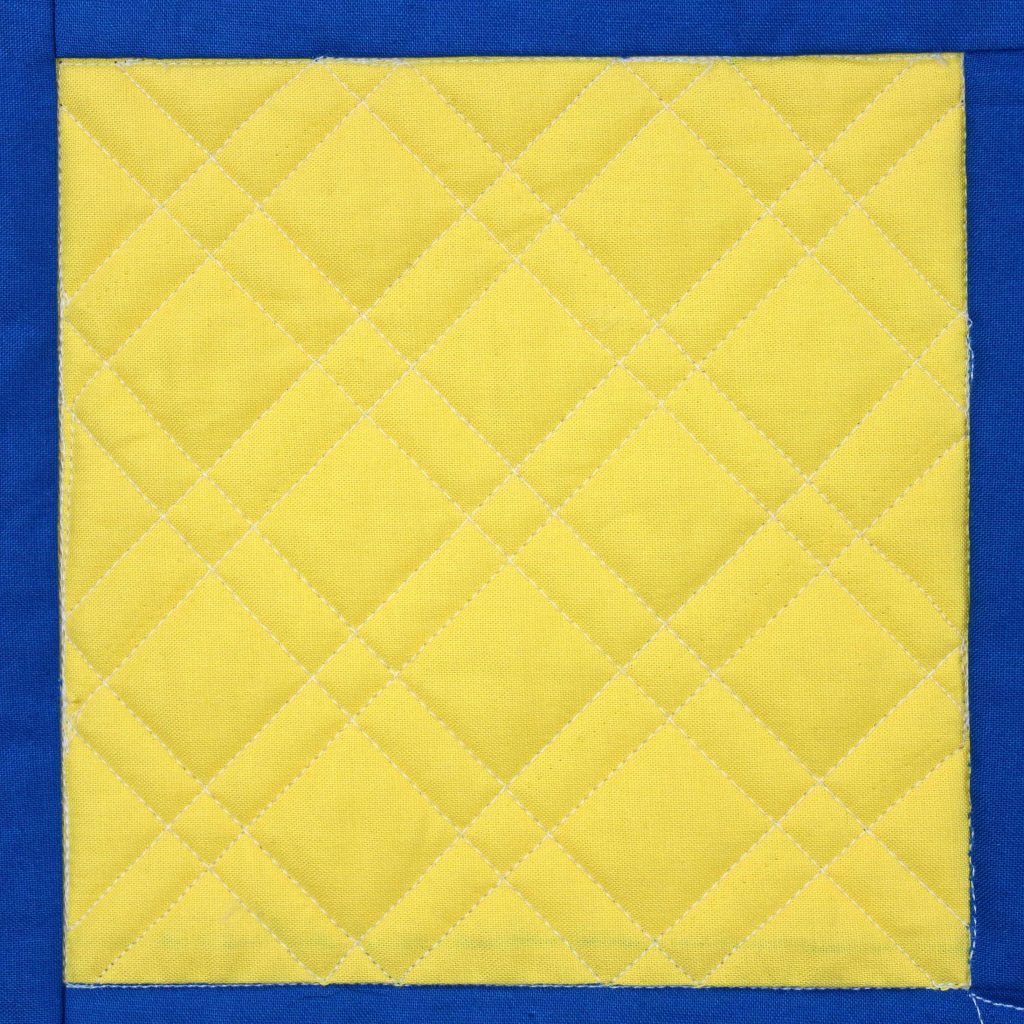
We spent some time in the article going over how a traditional diagonal crosshatch is stitched. To make a double crosshatch, first mark the traditional diagonal crosshatch grid with your favorite fabric marking device. Then, stitch one-quarter inch to each side of those markings.
Triple Crosshatch
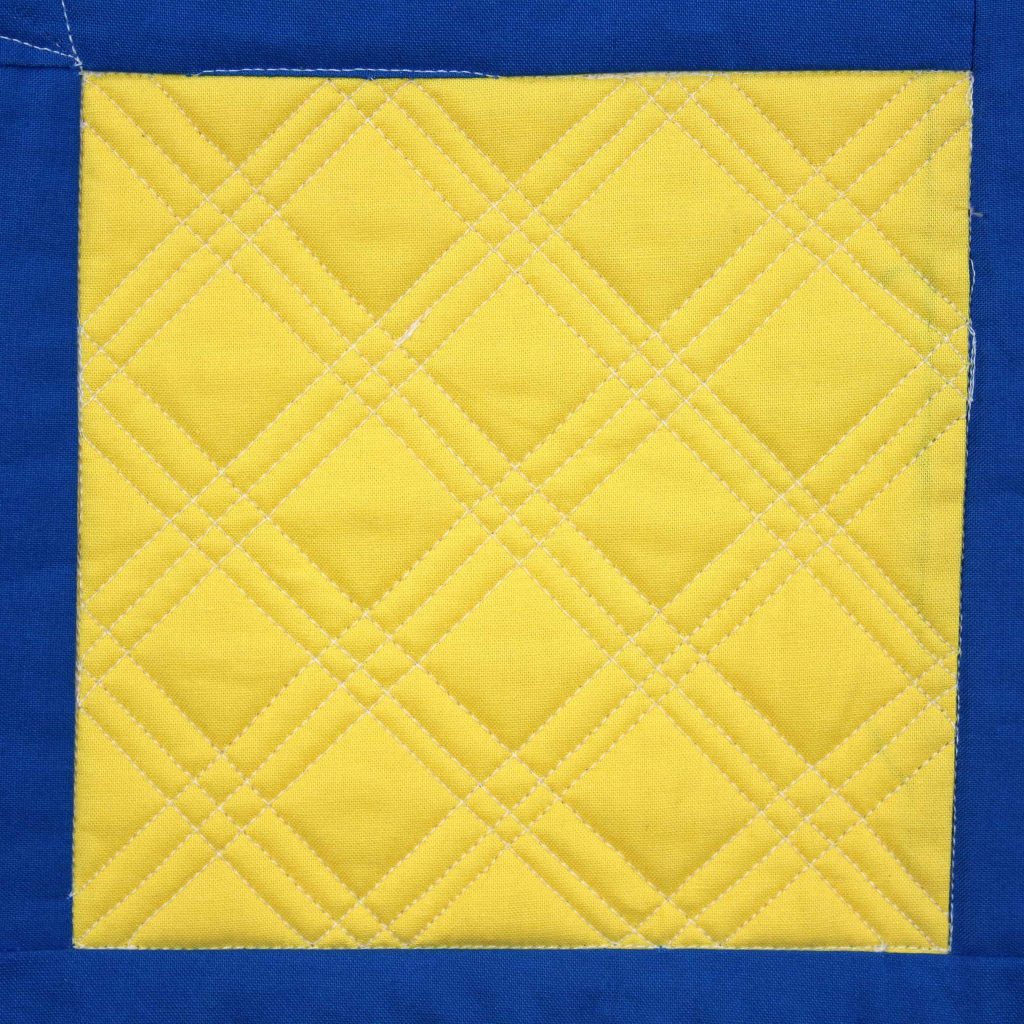
I love the way this one looks, but use a larger grid as it can get very dense with a small grid. I like using a two-inch grid. Stitch the first diagonal line of the crosshatch from the start point #1 to point #2 as shown in the Diagonal Crosshatching Guide shown above. Then, return to the starting position by stitching 1/4” away from this first line.
You will end up 1/4” away from your original starting point #1. Next, stitch 1/4” away from the first diagonal line on the opposite side as you move from position #1 to position #2. Continue in this manner to complete the grid. Essentially, you are stitching each “leg” of the diagonal crosshatch three times with them spaced apart from each other.
Curved Crosshatch
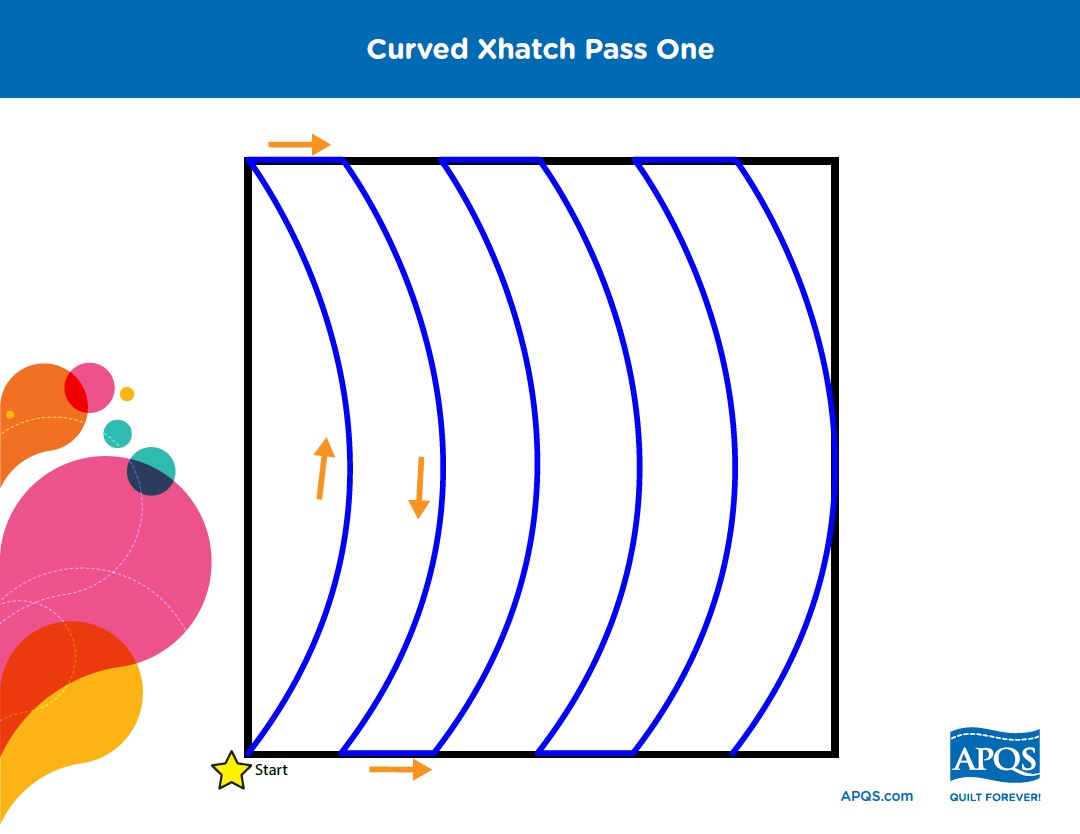
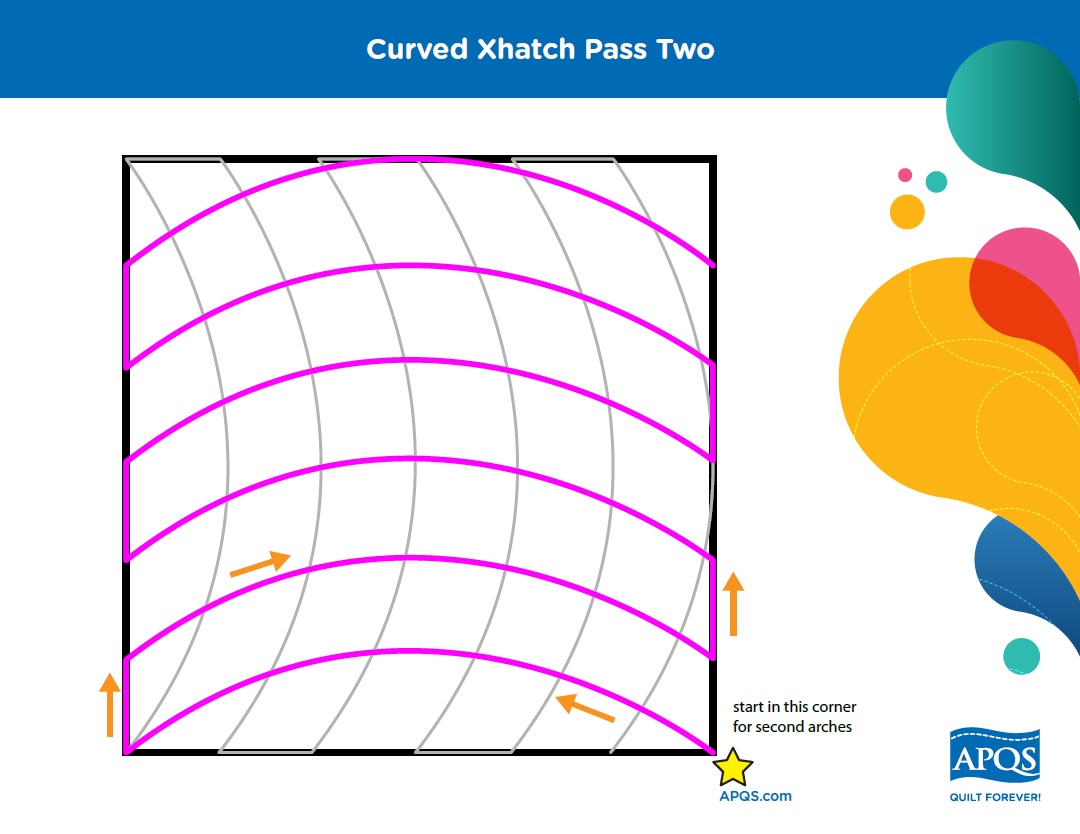
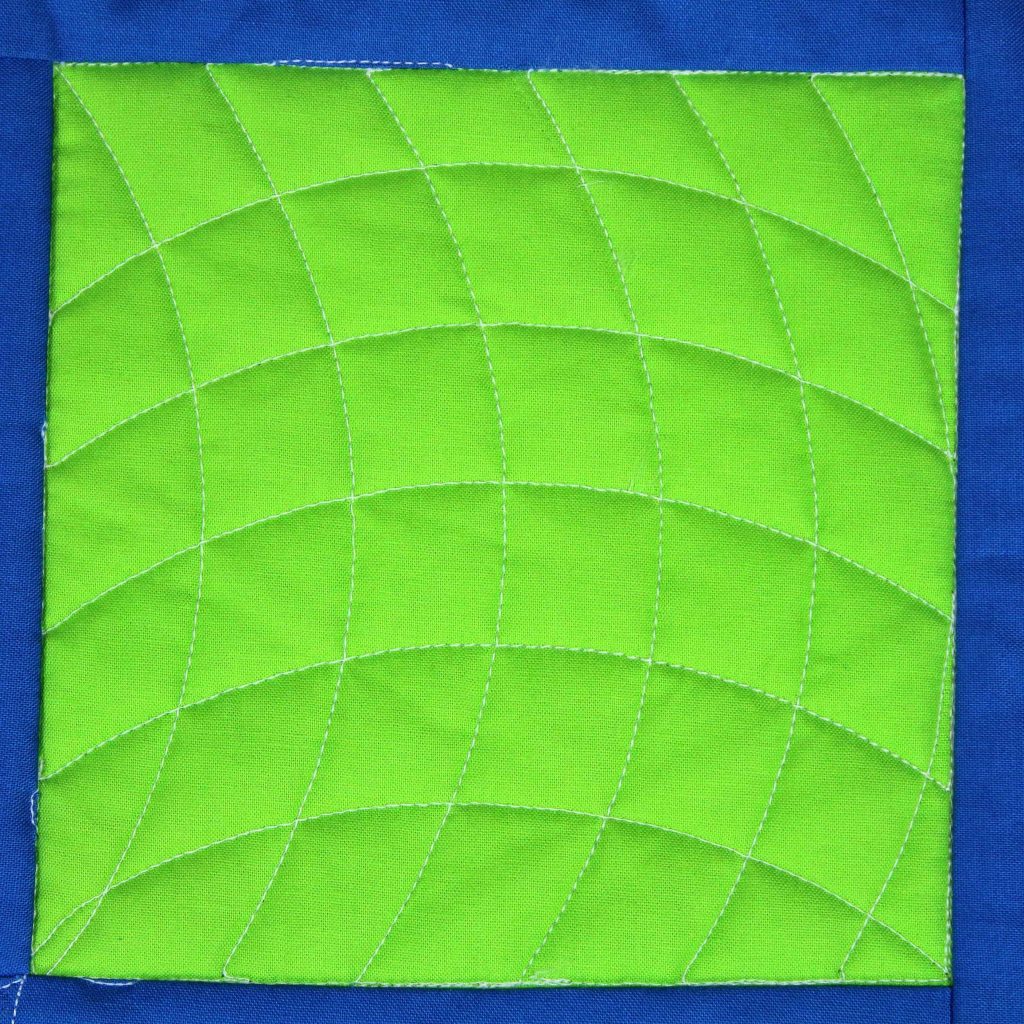
Using curved crosshatching in a block can be very dramatic. As with all crosshatching designs, you’ll want to stabilize the block first by stitching in the ditch so you’ll know if things are out of square as you work. Stitch the first pass as shown. Finally, stitch the second pass as shown.
Curved Crosshatch with Gutter
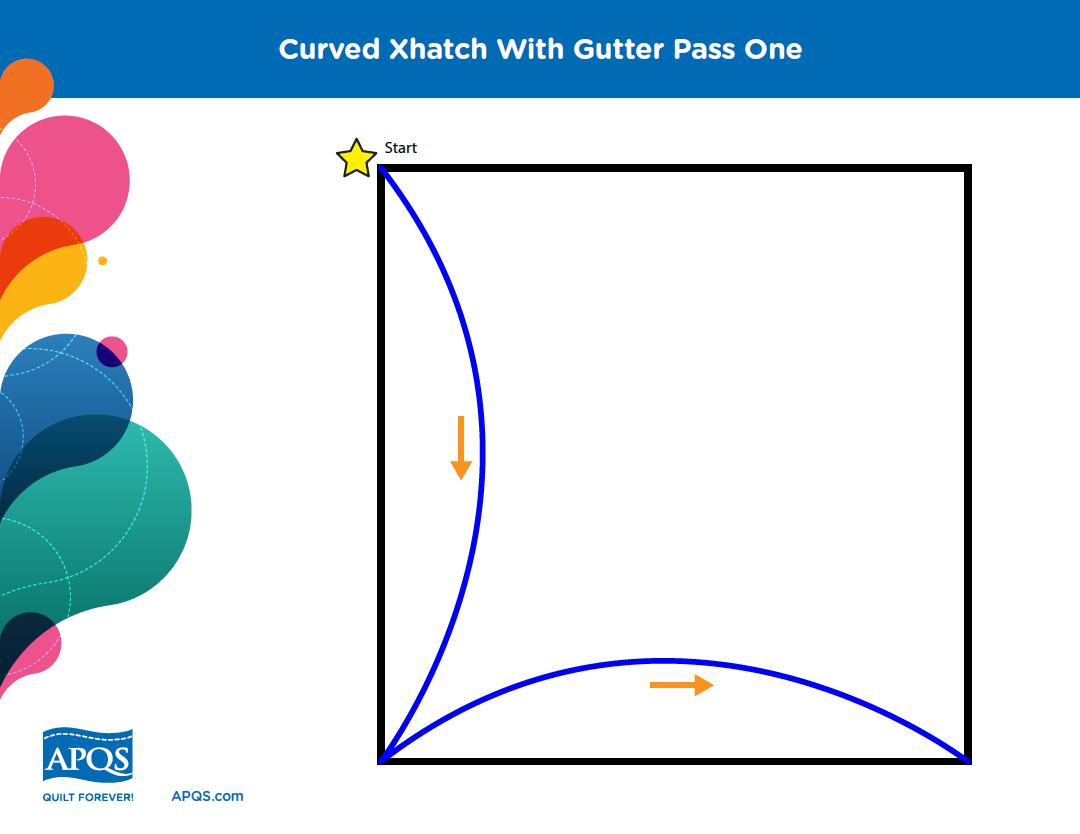
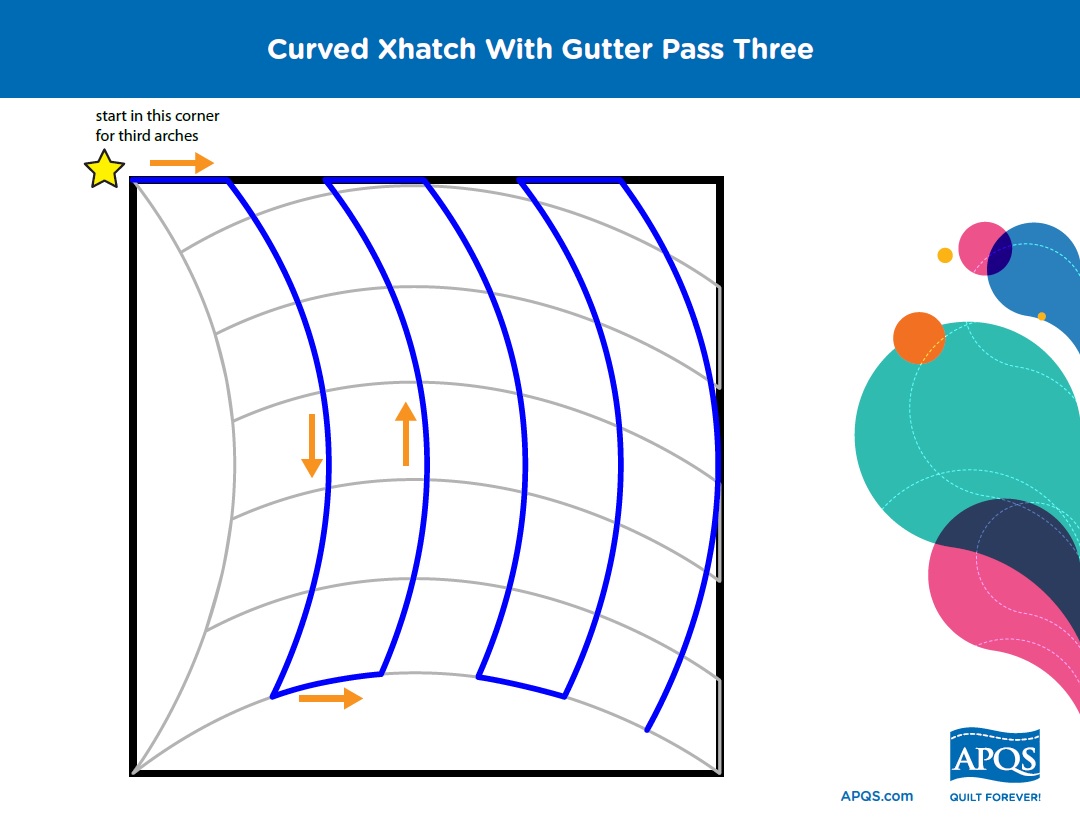
My favorite way to use curved crosshatching is with a gutter of negative space between the first arches and the block’s seams. I think this looks more elegant. You’ll begin by creating an arc along two sides of the block.
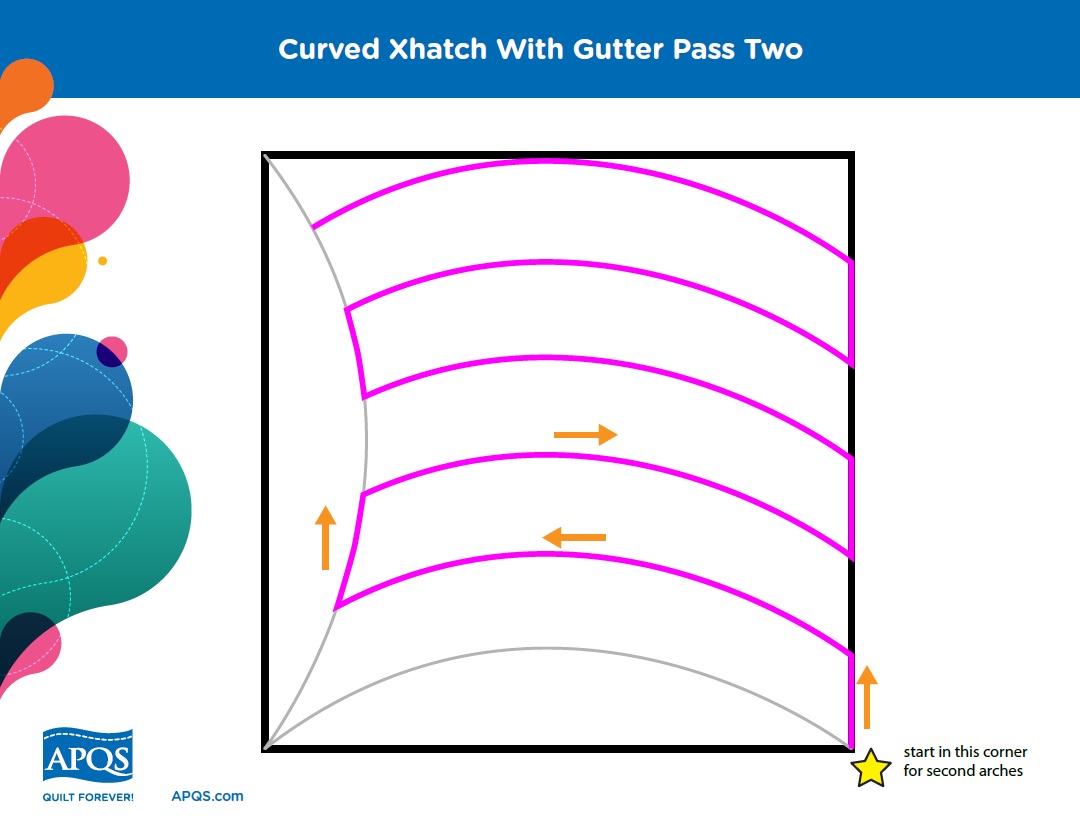
Next, sneak up the seam’s ditch to re-enter the block for the second pass. Notice that when the stitching line touches those first two arches, you’ll sneak up those arches so you can make the next curved line back out to the block’s seam line.
Finally, sneak along the seam’s ditch for the final pass. Once again, when you reach the original arc, you will use it to sneak along until you head back up to the block’s seam for each consecutive curve. Lovely, right?
Grid-based designs are a wonderful way to use a very traditional design in a more contemporary way. The possibilities are endless!

