Quick Quilt Top: Delectable Mountains – Help us pick a quilting design
This is the second article in our spring 2023 Quick Quilt Tops series. As part of this series, we’ll create a quilt together – from picking a pattern and a quilting design. You can read previous installments at this link.
In Part 1 of this series, I showed you several different layouts utilizing Delectable Mountains, an easy, fun block that can be twisted and turned to create some really cool designs. In this article, you’ll see what layout won, and you’ll have the opportunity to vote for three design options for the quilt.
Thanks to everyone who cast their vote. The winner of the design layout is… the Mirrored Mountains layout (#2)! In second place was #6, Buzzed Lightning. Tied for 3rd place was #3, Aztec, and #9, Sunset Reflected On Water. If you want a reminder of all the layouts, click here.
Mirrored Mountains Layout
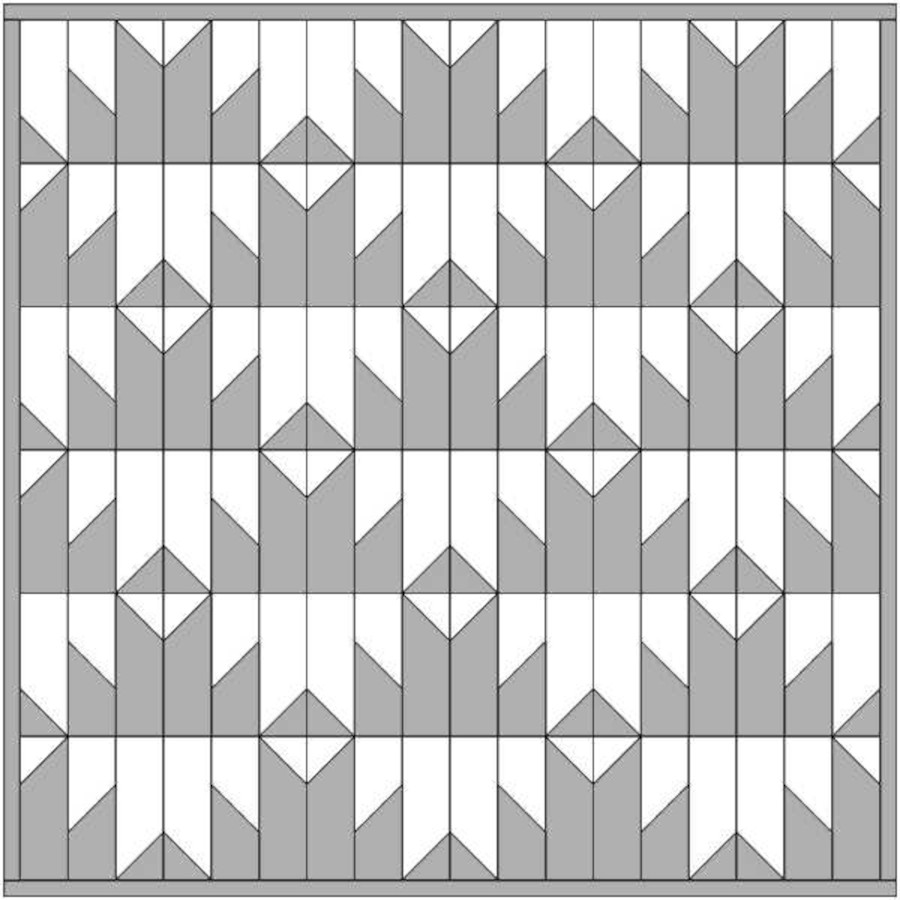
Once I knew the winning layout, I got to work making the quilt top.
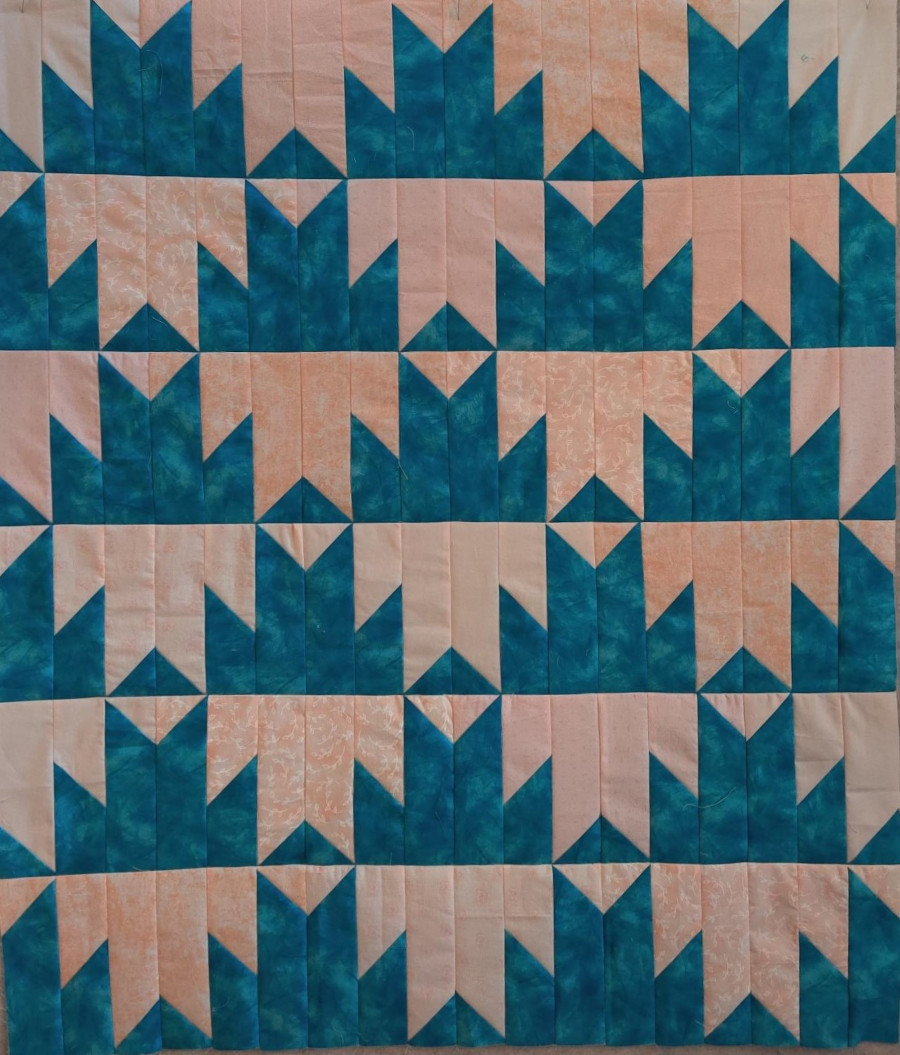
I decided on a complementary (opposite on the color wheel) scheme in my favorite color combination of turquoise and orange. Complementary colors can be a very strong combination so I softened the contrast by using a pale peach version of orange.
Since the design layout didn’t have any units on their side, I was able to use the square method referenced in my first blog post. This was the fastest and easiest method, but my 8” squares turned into 7 1/2” tall x 6 1/2” wide (unfinished) rectangles. I used the same turquoise fabric throughout, but varied the peach fabrics. This allowed me to have uniform turquoise mountains and peach mirrors from the same fabric.
These Delectable Mountains units are so fast and easy, I sewed up this small top in a day. After pressing, I was excited to start on a favorite activity – selecting quilting designs!
I like using plexiglass to audition designs so I can work at the same scale as the quilt itself. You can find plexiglass at most hardware store. Note that I’ve covered the edges with electrician’s tape – this creates a barrier that stops my dry-erase marker from going off the plexiglass and onto the quilt. I’ve also put painter’s tape on the writing side so I don’t accidentally put it upside down and get dry-erase marker on the quilt. With this method, I can try out designs using the actual quilt, develop a quilting path and practice the design before starting to quilt.
Design 1: Lacy Loops
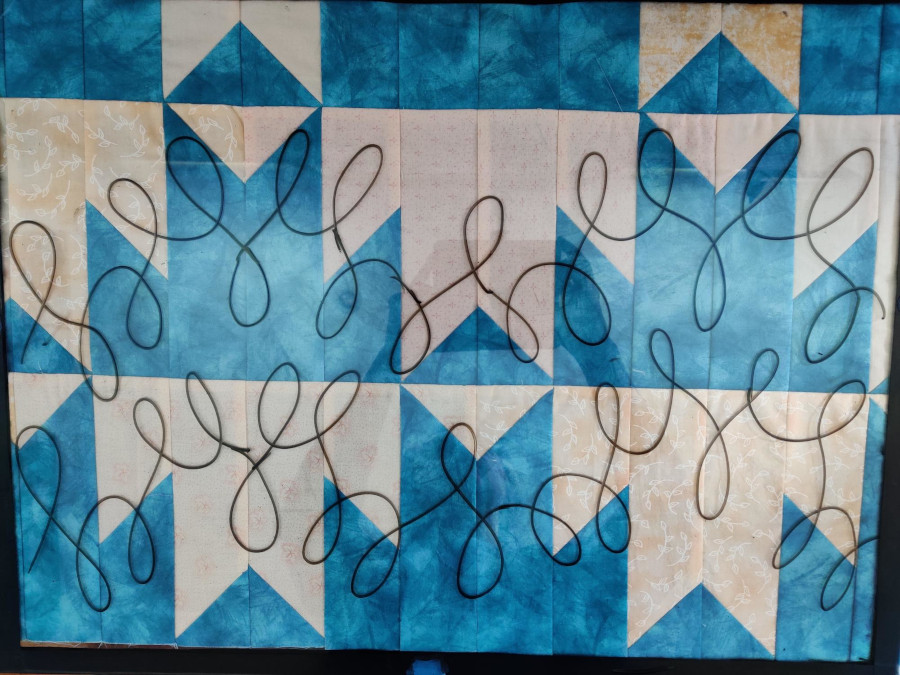
My first design is an all-over pattern that will provide background texture. This pattern is called Lacy Loops by Jessica Schick and is one of the over 750 patterns included with APQS Quilt Path. I like that the up-and-down design mimics the up-and-down of the mountains and has lots of movement.
Design 2: Custom treatment
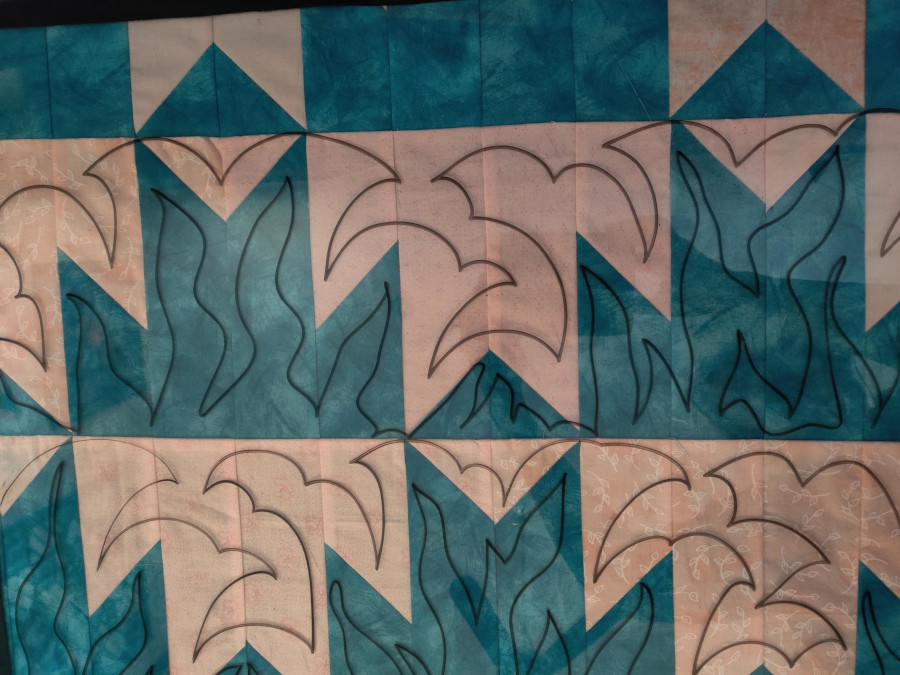
Design option #2 is a light custom treatment. I quilted clouds in the sky portion and crevices in the mountains and was able to do each row in a continuous line.
Design 3: Ruler Work
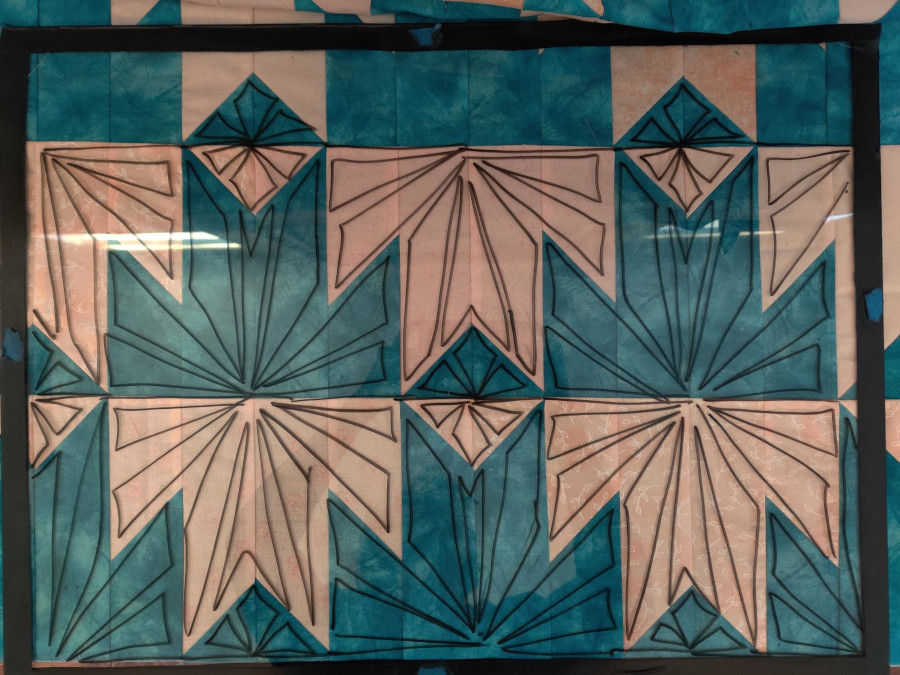
For #3, I went with some ruler work. I really like the starburst effect it gives. By quilting both sides of the starburst before traveling along the ditch to the next section, I can do the entire pass with one stop and start. Ruler work is very doable with a base expander, available at the APQS store. (If you want to purchase one, make sure to get the right one for your model and year.)
The key for this type of design is to stitch only on the section of the ruler between your thumb and finger; don’t try to stitch past your finger or thumb. Instead, stop and reposition the ruler. For more on ruler work, see this blog by APQS dealer Angela Huffman.
Vote for your favorite quilting design
I will quilt this quilt with the winning design, then give it away to one lucky winner, along with some great APQS goodies! Voting ends Friday, March 31, 2023, at 4 p.m. CST.
Sorry. This form is no longer available.


