How to quilt jelly roll quilts
We’ve always known that chocolate is a quilter’s favorite treat, but have you noticed that the fabric industry is trying to tantalize us by using “foodie” terms to cleverly package their latest collections? Among the bolts at your favorite store you can now find “jelly rolls,” “layer cakes,” and even “honey buns”. Don’t they know that quilters find all fabric yummy and delicious, no matter what it’s called?

The extremely popular jelly rolls normally include between 24 and 40 strips of fabric, each cut 2 ½ inches wide. The rolls may include all the fabrics within a specific line, or may be based on color value. Sometimes the strips will be from all different fabrics, and other times you’ll find duplicates. Study the outer edge of the jelly roll to search for repeating patterns.
Even with duplicate strips, quilts constructed from jelly rolls are “scrappy” by nature. While you can supplement your jelly roll with additional color strips to create blocks of solid color or negative space, your quilt will have lots of interesting pieces scattered about. You can find many books and patterns dedicated to jelly rolls, including several that cleverly use the precut strips to create traditional and modern blocks based on that size.

However, the most common jelly roll quilts are created by sewing the strips together on their long sides until the quilt is the desired length. If the quilt must be wider than the 42-inch long fabric strip, then the strips are sewn together on their short ends (often with a 45-degree seam) to create longer pieces. These are then trimmed to the new length desired. The angled seams are staggered throughout the quilt as the different strips joined together create interest.
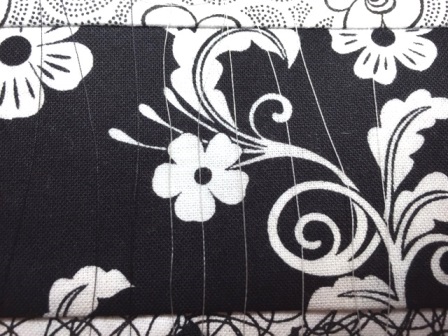
With all this pattern and color going on, the quilting lines will not really show up on most jelly roll quilts. Since the graphic linear motion is part of their charm, concentrate on soft, flowing curves or pantographs and avoid designs with lots of straight lines. Since the design will really blend in, don’t focus on perfection with your quilting. Let yourself wander across the surface. If your fabric contains flowers, for example, play with quilting casual blossoms with open petals and leaves, allowing your imagination to take hold. These quilts are great for practicing your freehand quilting, since the busy fabrics will camouflage any wobbles!
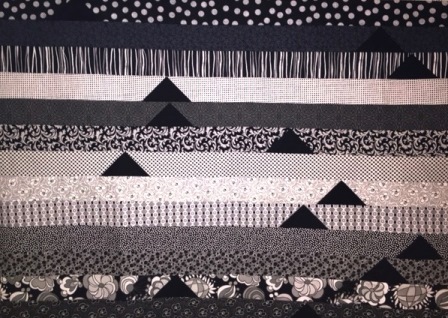
Choose your thread color based on whether you want to actually see the quilting line of stitches, or if you just want to see the texture created by the batting and thread, as well as whether or not you’re willing to change colors as you go. The photos below show the three different thread shades spread across my solid black fabric triangle, and the dark and light fabric values in my jelly roll quilt. Black thread is on the left, medium grey thread is in the center, and white thread is on the right. Notice how those different shades either completely disappear, or jump out and grab you − depending on the fabric’s value?


The decision on which thread is the “right” choice is very subjective and it all depends on what you want to highlight. Since this is my quilt and I want those black triangles to have more impact, I would choose black thread. It blends in completely with the black triangles so that the thread color doesn’t make them look like printed fabric. My second choice would be the grey. However, you might not like how much the black thread will stand out on my light fabric strips and you would choose white!
For a more out-of-the-box thread color choice, consider something that contrasts all your fabrics instead of blending in. The dark red thread below splashes across all of the fabric choices. It would introduce a nice counter-balance to the light and dark tones happening in this jelly roll quilt. In the end, as long as YOU love the color and quilting design, it doesn’t matter what anyone else’s opinion is! It’s YOUR quilt!


