10 tips for quick cutting
With so many quilt projects to make, it helps to be more efficient with your quilting time to accomplish your “to do’s” without creating more “UFOs.” Use these tips to whip out your quilts in no time flat!
1. Painter’s Tape to the Rescue
If you are cutting pieces of fabric that are longer than your cutting mat, borrow a mat from a friend and tape it to yours. Lay both mats face down and slide the edges together until they meet evenly. Join them together with a strip of tape down the seam, and then add some cross strips for extra stability. Then turn the mats over and cut the long strips without having to shift your fabric.

2. Tape your Rulers
Even if the measurement you need for your cutting strips is on your ruler, it can be helpful to place a piece of blue painter’s tape or Washi tape on the underside of the ruler at whichever line you are using. The edge becomes an important visual guide that keeps you on target and speeds up your cutting.

3. Stagger your Strips
After cutting strips to the correct width, you can make additional sub-cuts by staggering each strip across your cutting mat. Align one long edge with the long marks on your mat. Place the next strip next to the next long mark, overlapping your first strip. Keep the long fabric edges even with the mat markings. Place your ruler across all the strips, checking that your ruler’s horizontal lines match each strip edge and then make your sub-cuts all at once.


4. Spin your Mat
Limited studio space leaves little room for cutting. If you have lots of cutting to do, move to your kitchen or dining room table. When you have to sub-cut your fabric, position it on the mat and make your first cut. But instead of shifting the fabric and risking misaligning its edges, spin your cutting mat on the larger table to make the sub-cuts easier to do.
5. Let your Tool do the Work
Many quilters mistakenly keep their rotary cutter blade guard nut so tight that the cutter “slices” the fabric like a knife. However, the rotary cutting blade should ROTATE like a pizza cutting wheel. Loosen the nut holding your blade in place so that the blade spins as you guide it along the ruler.
6. Give Your Cutter a Tune-up
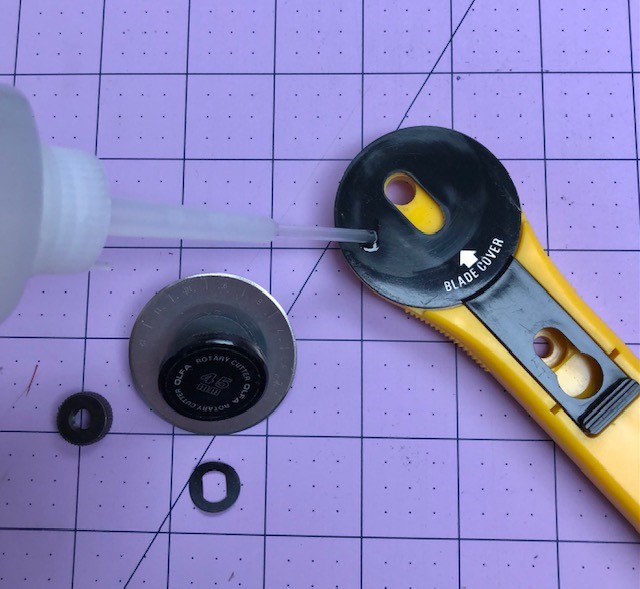
It doesn’t take much lint build-up between your cutting blade and the guard to impact your cutter’s performance. Hint: if you’ve never disassembled your cutter, take some close-up photos of each side so you know how to put it back together. Carefully remove the cutting blade and wipe it clean. If you’ve noticed that it “skips” parts of your strip as you cut, it’s time for a new blade. Put a single drop of clear sewing machine oil on the blade guard, then reinsert the blade. Wipe up the excess.


7. Sharpen your Scissors
Scissor blades that chew up your fabric or don’t cut near the tip are frustrating. Invest in a quality pair of scissors and make sure you only use it for fabric, not for paper or other materials. Tie a gawdy ribbon around one handle to remind others that it’s off limits.
8. Mate Fabrics for Sewing
If you will be sewing two different fabrics together from the same cut unit such as half-square triangles, place the fabrics right sides together and press them together. Then cut your strips from both fabrics at the same time. They will already be in place for piecing as the pressing helps nest the fabrics together.
9. Cut Triangles from Squares
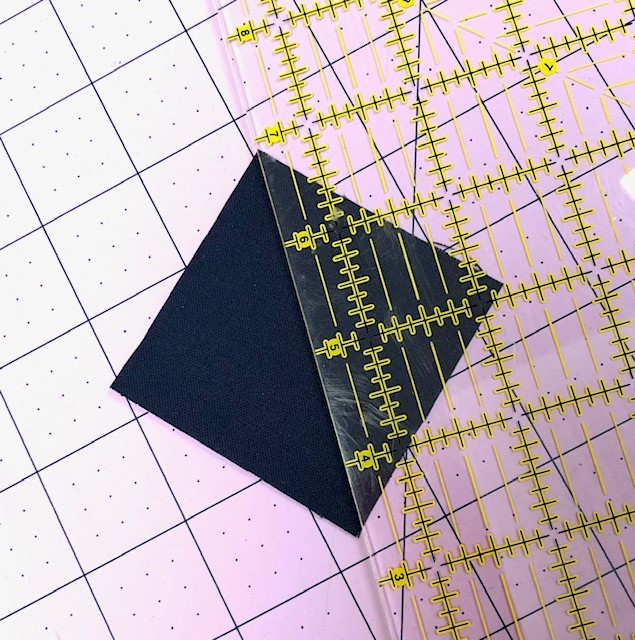
Determine whether your squares will need one diagonal cut (half-square triangles) or two (quarter-square triangles) to create the triangle shapes you need. For extra stability, use a cutting ruler that will completely cover the square’s tip when you cut the diagonal. This helps to stop the cutting blade from pushing the fabric and stretching the bias. (Not sure what size square you need for your triangles? Check out our handy downloadable chart.)

10. Mark your Mat
If you are using reference lines on your cutting mat, but you can’t see the line markings or reference numbers along all four edges (or the numbers read backwards), place a length of painter’s tape or plain Washi tape along the unmarked edges, then add your reference numbers so that you can see what each line represents in inches without sliding your fabric or moving your ruler.


